HTTP/2 serves web content faster through multiplexing, where several requests can be sent on the same TCP connection. However HTTP/2 is not available today on Azure App Services (web apps). A lot of people wish it was, but that's a limitation of Azure hosting right now. One of the Azure feedback admins had this to say on January 9, 2018:
Hi all. As everyone had noticed, we have upgraded App Service resources to Server 2016. As mentioned in our updates, this is indeed paving the way to HTTP/2 support across the board. As we are settling in with stability of the new OS version, we will begin work to open up HTTP/2. When I have a concrete timeline to share, I will do so. We should expect that in the next few months.
Thanks,
Oded
So it's coming, and hopefully soon, but it's not there yet. In the meantime, you can put static resources like images on an Azure CDN and get HTTP/2 performance benefits, in addition to normal CDN benefits for long-lived content, like cache headers that don't expire any time soon and a geographically distributed network to host it on.
This post is a walkthrough on how to do that with Azure Storage and Azure CDN services.
Azure Setup
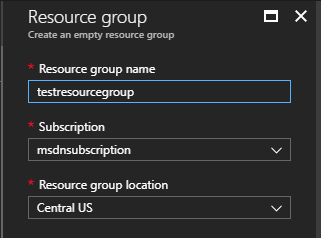
First, go into your Azure account and create a new resource group. This makes it easier for testing so you can delete the whole thing when you're done playing around. I named mine testresourcegroup. There are so many pieces to an Azure infrastructure, you are better off if you prefix or suffix everything with one name, like your project name or acronym, and then put the name of the Azure thing you're creating somewhere in that name.
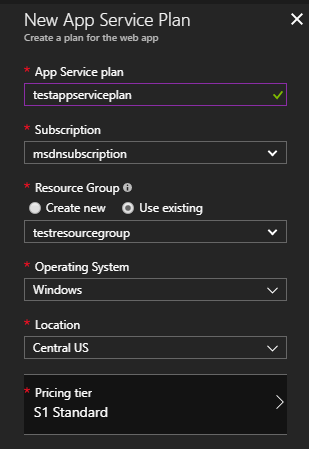
When that's created, go to that resource group. We'll add an App Service Plan (Azure-speak for the server/account type you want for your web app) and an App Service.
I click the + button to add, search for "App Service Plan", pick that, and fill that out. In the Pricing tier, I selected "Free" for this demo.
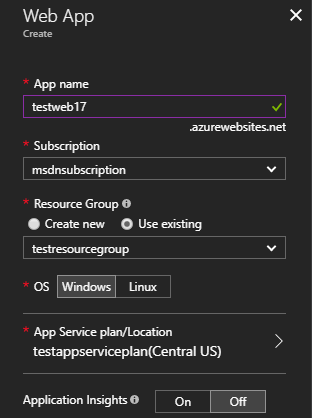
Now create a test web app by adding another resource to your resource group, searching for App Service, and selecting Web App. Be sure to select your newly created App Service Plan. I ended up having to go to testweb17 to get to a unique, publicly addressable name.
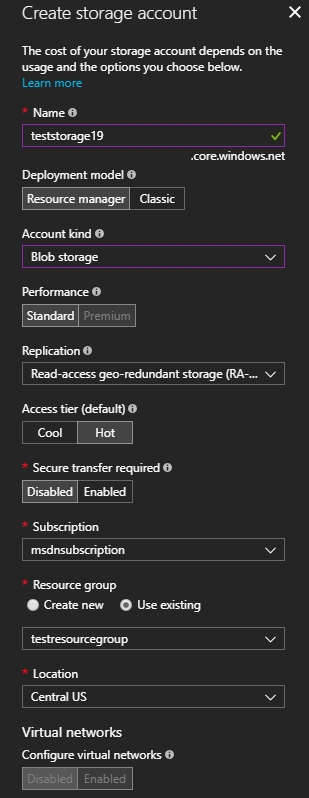
While that's being created, let's add Azure blob storage. Go back to your resource group, click the + button again to add, and search for "blob storage", then select "Storage account – blob, file, table, queue". Give it a unique name. In my case, I had to use teststorge19 to get a unique, publicly addressable name. I also changed the default Account kind to Blob storage since that's all I need. You can come back later and tweak the other settings here based on your app's needs.
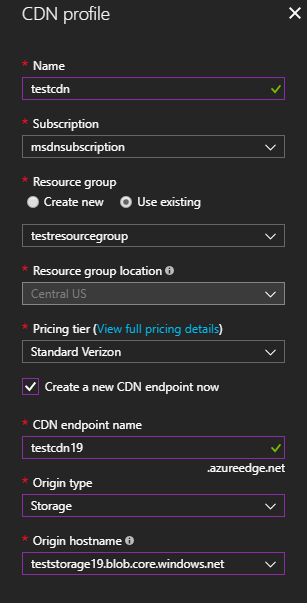
Now we need to create the CDN in Azure. Go back to your resource group, click the + to add, and search for "CDN" and select it from the list. Give it a name. I used testcdn. Pick a pricing tier. I used Standard Verizon (Verizon allows custom domain HTTPS connections, Akamai doesn't).
Then select the option to create a CDN Endpoint. Like the App Service and App Service Plan relationship, the CDN is the service level and pricing, but the CDN Endpoint is the thing you really connect to. Pick a CDN endpoint name. I used testcdn19 to match up with my storage account name. Again, this must be unique and publicly addressable. Be sure to pick Origin type of Storage and pick the Original hostname for your storage account from the drop down. I used teststorage19.blog.core.windows.net since that is my test storage account created above.
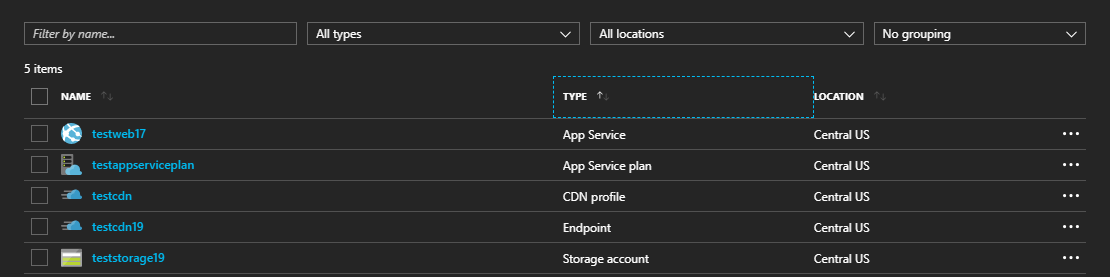
When Azure is done huffing and puffing, your new resource group should look like this, but of course with your names. You'll have an App Service Plan with an App Service, a Storage Account, and a CDN Profile with a CDN Endpoint.
Web Setup
I've made a one page web app with an index.html and an image. You can download them from GitHub or use your own content or test page. It's nothing more than this HTML and a picture.
<!DOCTYPE html>
<html>
<head>
    <meta charset="utf-8" />
    <title>HTTP/2 with Azure CDN</title>
</head>
<body>
    <p>Here is an image of an elk in Rocky Mountain National Park.</p>
    <img src="images/Fall - Estes Elk.jpg" />
</body>
</html>
To upload this web app to Azure, I first need to get a publish profile from Azure in my App Service.

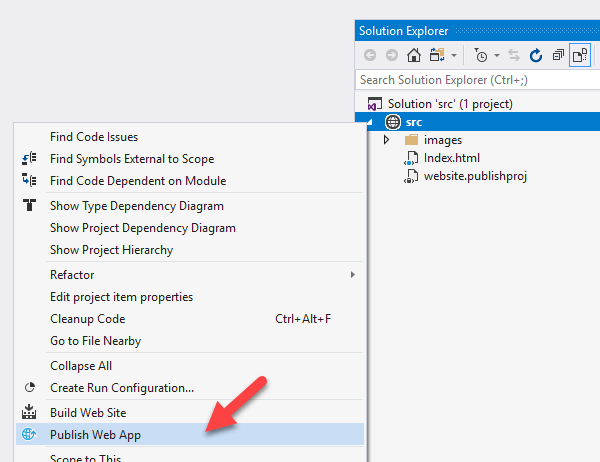
Then I open my web app in Visual Studio, right click on the web site or web project and select Publish Web App.
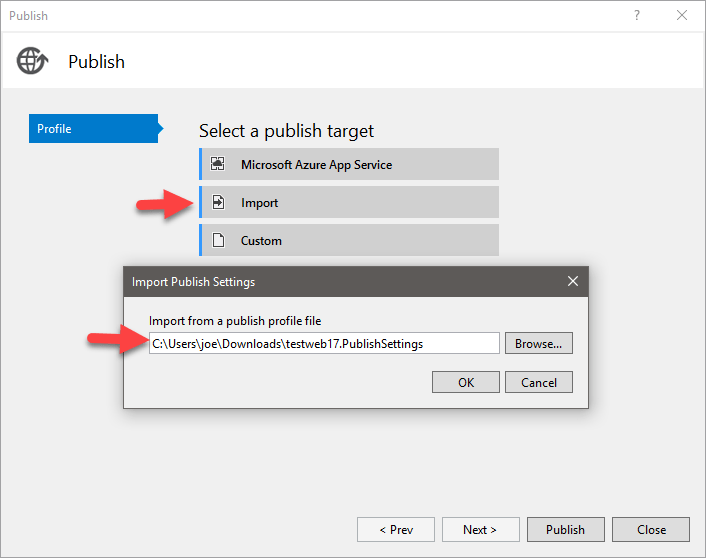
Next, I tell Visual Studio to import the just downloaded publish profile.
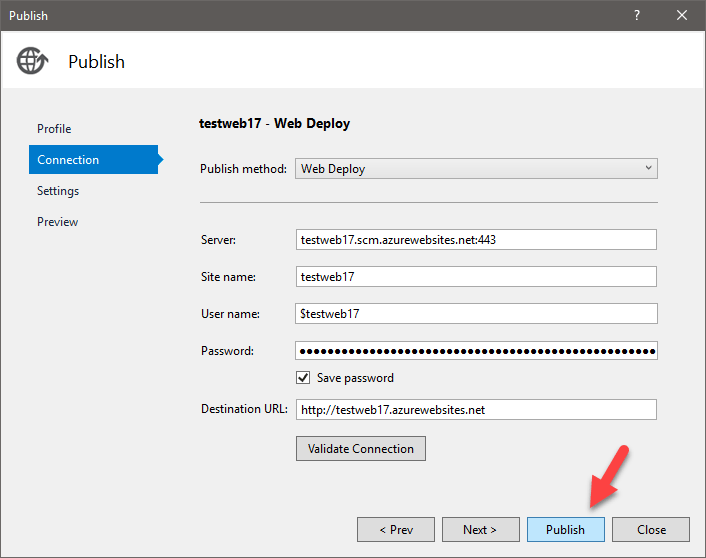
Then when I publish my web app, it goes up to Azure and is publicly available.
After the publishing process completes, my browser opens the test web app at https://testweb17.azurewebsites.net/.

If I open Chrome Dev Tools and go to the Network tab, I can see the two requests (one for the page, one for the image) are using HTTP 1.1. Let's see if we can get that image to be served using HTTP/2.
Storage Setup
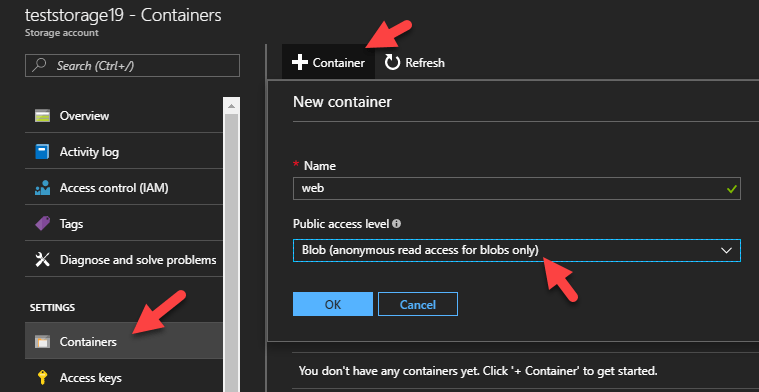
Go to your Azure resource group, find the storage account you set up, and add a blob container. This is not quite a folder, but kind of acts like one for our purposes. I'll add one for "web". Be sure to set your container to something other than Private. I set mine to Blob.
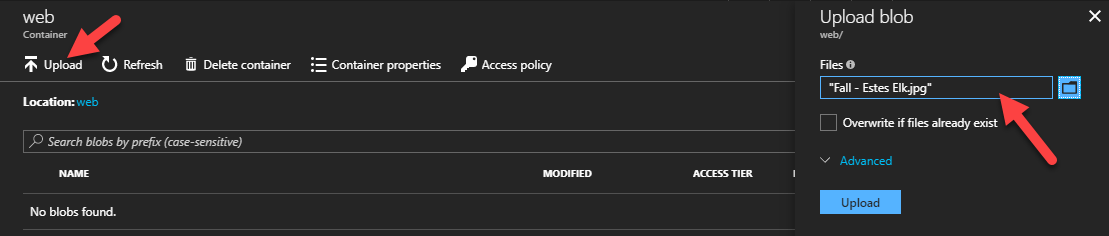
Now I can select my container and upload the image to it. There are lots of client tools to upload, download, and manage your Azure storage files, like CloudBerry Explorer for Microsoft Azure, which is free.
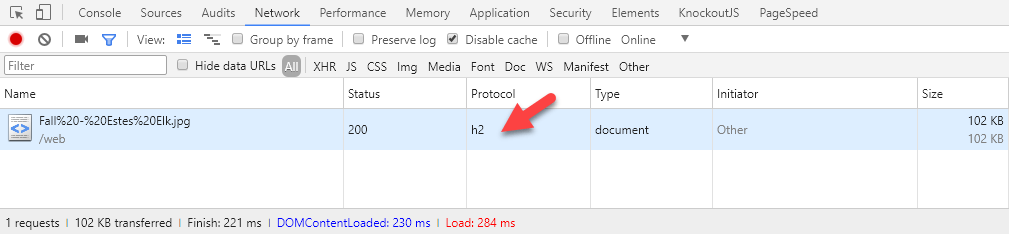
Once I have uploaded the image, I can click it and get its URL. Open that URL to test that you can see the image. If not, check that you didn't make your container private. Also, be sure you are using the correct case. Calls to storage blobs are case sensitive. If you file is Image.jpg and request image.jpg (lowercase "I"), you'll get a 404. In my case, the image URL ends up as https://teststorage19.blob.core.windows.net/web/Fall%20-%20Estes%20Elk.jpg.
If you open Chrome Dev Tools and refresh the image, you can see it's being served over HTTP/2 already without being on a CDN.
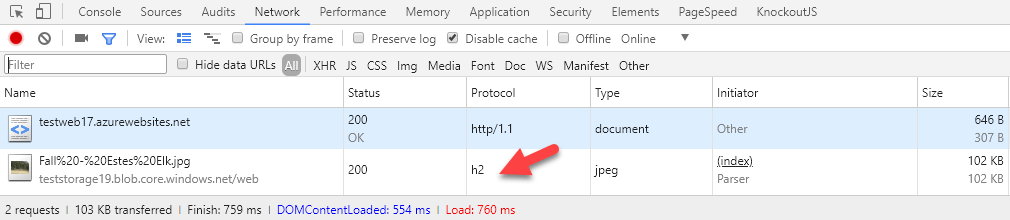
Let's update the HTML to use that new URL and check that it's still using HTTP/2 when uploaded to the Azure App Service.
<!DOCTYPE html>
<html>
<head>
    <meta charset="utf-8" />
    <title>HTTP/2 with Azure CDN</title>
</head>
<body>
    <p>Here is an image of an elk in Rocky Mountain National Park.</p>
    <img src="https://teststorage19.blob.core.windows.net/web/Fall - Estes Elk.jpg" />
</body>
</html>
I made this change and re-published the web app, and sure enough, it's served over HTTP/2.
Let's go one step further and serve the image from a CDN, instead of directly from the storage account.
CDN Setup
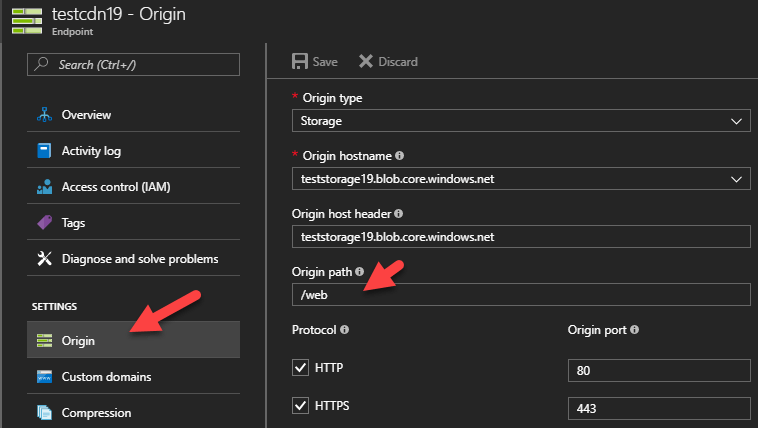
In Azure, open your CDN Endpoint. You should see the URLs for your storage account and your CDN that maps to your storage account.

Since all our content is in a storage container called "web" and that becomes part of the URL, we can make that a default path for the CDN Endpoint under Origin.
Now we'll have URLs like this, using the CDN and skipping the /web/ folder in the URL:
https://testcdn19.azureedge.net/Fall - Estes Elk.jpg
instead of:
https://teststorage19.blob.core.windows.net/web/Fall - Estes Elk.jpg
This change can take up to 90 minutes to propagate, so if you get 404s, that may be what's happening.
Once you can browse to the image URL with your browser, replace that image source in the HTML markup and re-publish your web app to Azure.
<!DOCTYPE html>
<html>
<head>
    <meta charset="utf-8" />
    <title>HTTP/2 with Azure CDN</title>
</head>
<body>
    <p>Here is an image of an elk in Rocky Mountain National Park.</p>
    <img src="https://testcdn19.azureedge.net/Fall - Estes Elk.jpg" />
</body>
</html>
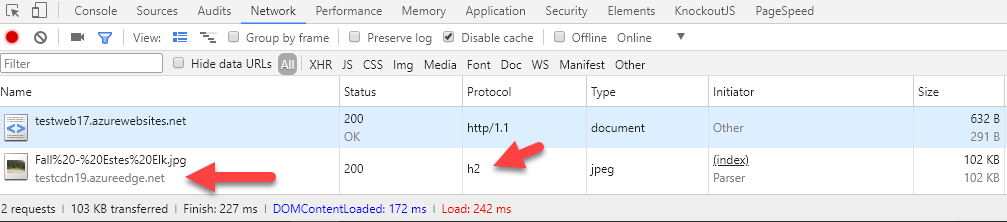
When you browse to it now, you can open Chrome Dev Tools and confirm the image is coming from the CDN and is using HTTP/2.